|
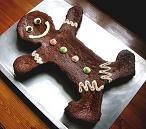
Graduate-Shaped Cake
Ingredients:
Cake-Shaping Strip (from 6 sushi-mat segments)
Heavy-duty aluminum foil
Sheet pan
Prepared cake batter (from about 1 1/2 boxes of cake mix)
2 batches of Chocolate Decorating Clay (or fondant or extra frosting)
1 batch of Peanut Butter Decorating Clay (or fondant or extra frosting)
1 (11-oz.) package of semi-sweet chocolate chips
2 tablespoons vegetable/canola oil
1 (16-oz.) container of store-bought white frosting
1 (16-oz.) container of store-bought chocolate frosting
Small sheet of paper
Twist tie
Instructions:
1. Line a sheet pan with a sheet of aluminum foil. Shape the Cake-Shaping Strip into a shape of the graduate. (Don't worry about the hat yet.) Exaggerate the spatial features, as they'll seem smaller after you unwrap and ice the cake. Wrap the bottom foil layer around the strip, cutting the foil if needed. Press small balls of foil into outer corners or edges if you think that the foil didn't wrap around the portion well enough to prevent cake-batter leakage. Wrap additional 3x6-inch pieces of foil around select regions of the strip if needed to prevent leaking.
2. Prepare your cake batter. Spray the strip and foil with cooking spray. Pour the cake batter into the prepared "pan" and bake until done. Let the cake cool.
3. Cut away any cake batter that leaked through the strip. Carefully remove the Cake-Shaping Strip. Insert the flat edge of a table knife between the strip and the cake if this helps.
4. Generously coat two pieces of vinyl mats with powdered sugar. Place the Peanut Butter Decorating Clay between the mats and roll it out. Apply a medium-thick layer of the store-bought frosting to the head portion of the cake. Gently remove the top mat, and flip the bottom mat (with the rolled out Decorating Clay) onto the head portion of the cake. Remove the bottom mat. Lightly press the Decorating Clay into the cake, and cut away the excess. Use a wet table knife to smooth out any bumps or tears.
5. Use extra Peanut Butter Decorating Clay to make a nose. Place it on the face, whet your finger with water, and gently run your finger along the sides of the nose to make it smooth with the base layer.
6. Roll out the Chocolate Decorating Clay as described above. Apply a medium-thick layer of chocolate frosting to the bottom part of the cake, and flip the rolled decorating clay onto the bottom portion of the cake. Gently push the decorating clay into the sides of the cake and cut away the excess decorating clay.
7. Take a small sheet of paper, roll it up, and "tie" it was a twist-tie. This is the diploma. Place it on the middle of the cake.
8. Use extra Chocolate and Peanut Butter Decorating Clay to form the bottom sleeve portions and bottom portions of the graduate's arms and her hands. Position the hands to look like they're wrapping around the diploma. Use the wet-knife process described above to make the sleeve portions continuous with the bottom layer.
9. Place a sheet of wax paper on a large tray or lid. Combine one bag of chocolate chips and two tablespoons of oil in a microwave-safe bowl. Microwave for 30 seconds. Stir. Continue to microwave for 30-second intervals until the chocolate is melted and smooth. Spread the chocolate onto the wax paper. Freeze the chocolate layer just until it hardens. Use a table knife, and "score" a graduation hat. Then, slowly "saw" into the chocolate until the hat is cut. It shouldn't be completely square, as it should have an angled side so that it can rest on the cake tray. (See the picture below.)
10. Use chocolate frosting to frost the bottom portion of the cap on the top of the cake. Then apply a medium-thick layer of chocolate frosting to the very top of the cake. Press the chocolate piece into the frosting.
11. Pipe on the graduate's hair, lips, and any other features.

|