|
May 1, 2011 - Mother's Day Heart Cake
Click here for short instructions
Happy May Day Readers! Did any of you share my childhood May-day tradition of anonymously delivering flowers to friends and family on May Day? We'd drop off the flowers and run away. Then coincidentally, we'd stop by the same house to visit ten minutes later. They'd mention how they received surprise flowers. How funny it was, because we knew that we made them so happy! In tribute of these great childhood memories and the upcoming Mother's Day holiday, here's a Mother's Day cake. Ironically, I kept thinking about how much better this cake would have turned out if my mom would have been here to help ice it! Nevertheless, I'll share my experience.
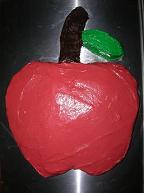
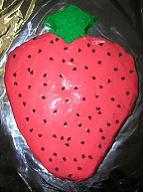
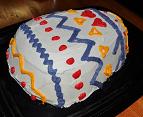
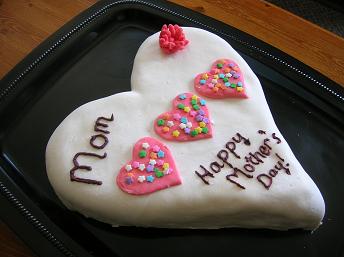
To make this cake, you'll need a Cake-Shaping Strip (look here about how to make one), a sheet pan, prepared cake batter (from about 1 box of cake mix), fondant (made from about 4 lbs of powdered sugar and 2 16-oz. containers of marshmallow fluff), icing (about 1 16-oz. white-icing container), food dye, extracts, and sprinkles. Here's a picture of the finished product.
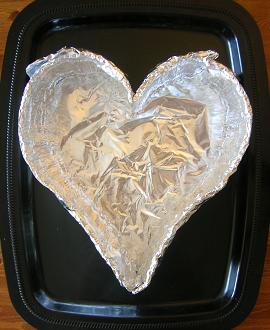
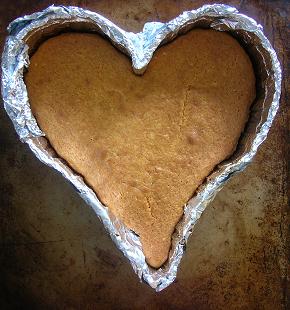
First, make a Cake-Shaping Strip as described here using four sushi-mat segments. Because a heart shape can be wide, first line a serving tray with heavy-duty aluminum foil, shape the Cake-Shaping Strip into a heart, and wrap the foil around the edges of the strip. (See the picture below.) Then move this new "cake pan" over to a cookie sheet (don't forget this!). Wedge a little semi-loose ball of foil in the top, center crease of the hear along the outside of the strip. The base foil sheet can't wrap around this part of the strip very well due to the sharp angle, so the foil ball prevents the batter from leaking through. (You can do this along any other portions of the strip that you have reason to worry that the batter would leak underneath the strip or push the strip over.) Next, fill the pan with cake batter (made from 1 box of cake mix), and put it in the oven.
While the cake was baking, make the fondant. I tried hard to find the easiest recipe, as I was only working on this projects during brief intervals that my 7-month-old was asleep. I combined a few recipes and user comments to arrive at my final fondant recipe.
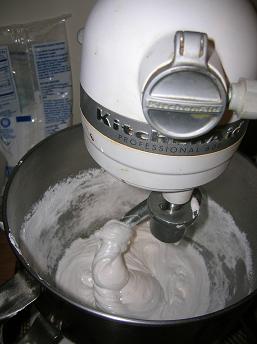
First, spray a stand mixer's bowl and hook attachment well with cooking spray. Next, add 2 (16-oz.) containers of marshmallow creme/fluff. Then add 3/4 of a 2-lb package of powdered sugar. Turn the mixer on low speed. Let it go for awhile (e.g., the time that it takes to bathe a 7-month-old.) See it coming together? But it's not done.
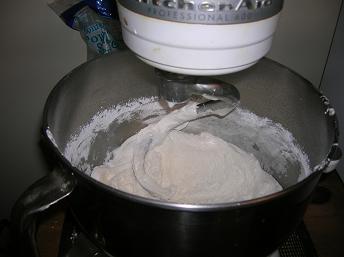
Gradually add more and more powdered sugar until the mixer stops being able to combine it all or until you've added about one and a half (2-lb) bags of powdered sugar. Maybe you can see below how the fondant was starting to stick to the sides so the hook couldn't mix it anymore? I decided now was the time to finish things up by hand.
Now put some powdered sugar on a kitchen counter, and scrape your fondant out of the mixer. Knead the fondant, gradually adding more powdered sugar just until the fondant isn't sticky any more. But make sure that it's not so dry that it's cracking! I used just shy of 2 (1-lb) bags of powdered sugar, such that I had about 2 cups of powdered sugar left in one of the bags. If you want to add any food dye or flavoring to the fondant, now's the time. I added just a little vanilla. I planned on having the base fondant layer to be white, and I decided to add food dye to the decorative portions of the leftover fondant later. Wrap your finished fondant in plastic wrap, and put it in a ziplock bag. Don't put it in the fridge. I did. It was unnecessary, and just took extra time later to let it warm back up.
Okay. Back to the cake for now. It's done and out of the oven.
As always, make sure to first cut away any small, leaked portions of cake on the outside of the strip. Then slowly remove the strip. Feel free to use a flat edge of a knife wedged between the cake and strip if that helps.

Cut off the top surface of the cake so that the cake is nice and flat. I use a long serrated knife for this. Let the cake cool.
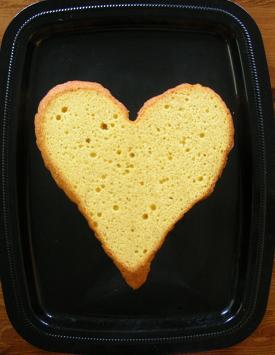
Then put your serving tray over the cake, and flip the cake onto the tray. The cut side of the cake will now be on the bottom. I moved my cake to the tray early and forgot to do this flipping part. I have no idea why. It just ended up making my cake a little bumpier than it should have been.
Apply a thin layer of white icing over the cake. This is your crumb coat. I read that this is very important when working with fondant, as it helps make the fondant layer look smooth. Let this layer of icing dry completely.
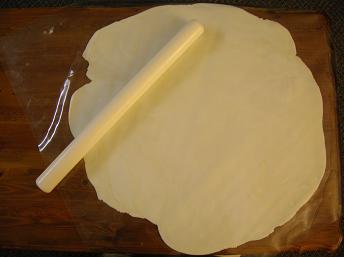
After it is dry, unwrap your fondant. It's time to roll it out. I've read that you can do this by covering every square inch of a surface, your hands and a rolling pin with shortening (though I don't know why your hands need to be greased up if the rolling pin is). But I was looking for a quicker, less messy way to do this. So instead, I put the fondant between two pieces of vinyl. I bought "The Mat" for this purpose, which just appears to be two pieces of food-safe vinyl cut to a nice size. (I bought it here. They also have nice YouTube videos.) The vinyl must be greased with cooking spray or shortening first. (I used cooking spray. I forgot the first time around, and that was a mess.)
Once the fondant's between the greased vinyl, just roll it out. I used a fondant 20-inch handles-free roller for this. It worked well.
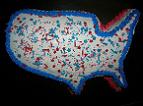
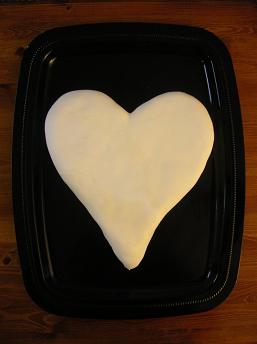
It's time to get organized. Apply a medium-thick layer of white icing all very cake. Then, before the icing dries, remove the top fondant mat, and flip the fondant and bottom mat over onto the iced cake. Your fondant will look like a tent. We want to get rid of the tent look, so gently push the fondant into the bottom of the cake. Now press the fondant into the icing layer along the rest of the cake. Cut away any excess fondant. You can re-use portions that do not have icing on them. Just make sure to wrap and bag them as described before.
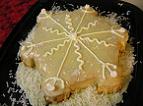
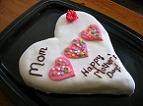
Well this looks fun. Just a blank canvas now to decorate. I added some red food dye to part of my extra fondant portion (and some extra powdered sugar to make it the right consistency. I rolled this fondant out very thin and cut out three heart shapes using a heart stencil. After putting these on the cake, I topped them with sprinkles. I also cut out two flowers. I put one flower on top of the other, slightly rotated. Then I gently pressed the petal portions up around a center portion. I'll experiment with more fondant decorations another day. Finally, I just piped on some text. Mom was always better at the piping then me. Happy early Mother's Day Mom!
|